


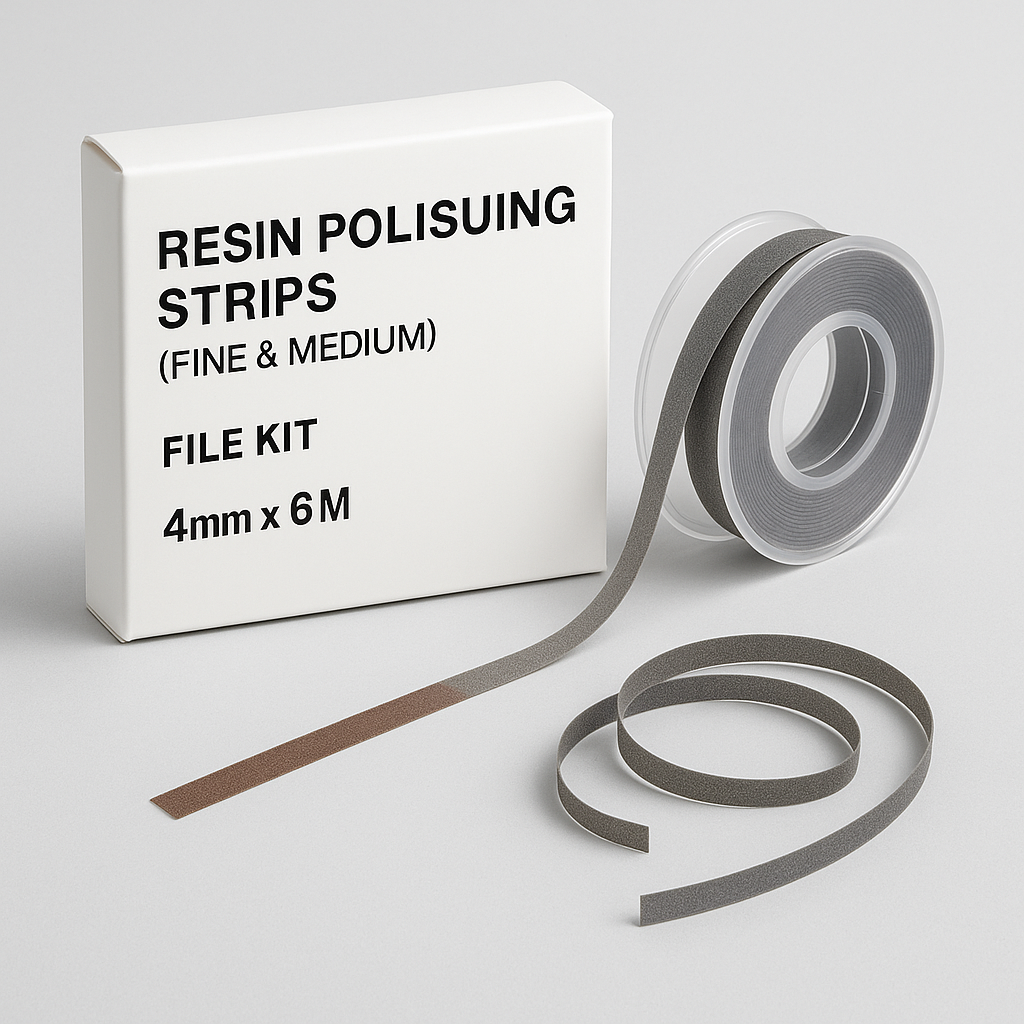
Interproximal finishing is one of those small steps that separates a good composite from a great one. Resin polishing strips—especially in fine and medium grits—let you shape, smooth, and shine the contact areas your burs and discs can’t safely reach. Below is a practical guide you can hand to your team for consistent, predictable results using a 4 mm x 6 m Resin Polishing Strips File Kit for dental sanding of teeth/composites.
What Are Resin Polishing Strips?
Thin, flexible polyester or mylar-backed abrasives coated with resin-bonded grit. They’re slit in the center (or fully continuous) so you can thread them through tight interproximal spaces to finish and polish class II/III composites, resin veneers at the margins, orthodontic adhesive residue, and small overhangs—all while preserving contour.
Why Fine & Medium Grits?
- Medium grit: Controlled reduction. Ideal for removing slight overhangs, blending step-offs, and refining proximal anatomy without gouging.
- Fine grit: Pre-polish and luster. Removes micro-scratches left by medium grit and improves plaque resistance and patient comfort.
Using both grits in sequence yields a sealed, glossy margin that resists staining and recurrent decay.
Kit Specs (4 mm x 6 m)
- Width: 4 mm — narrow enough to navigate tight embrasures without abrading adjacent anatomy.
- Length: 6 m roll — cost-effective; cut to custom lengths for better ergonomics and reduced waste.
- Resin-bonded abrasive — consistent cutting action with less shedding.
- Color-coded grits (varies by brand) — quick ID chairside.
Step-by-Step Protocol
-
Isolate & Protect
Use wedges or Teflon tape to shield adjacent teeth. Ensure the contact has been properly shaped with matrixing before finishing. -
Thread the Strip
Insert apical to occlusal with gentle seesaw motion. Keep the abrasive away from gingival tissues when possible. -
-
Light tension, short controlled strokes.
-
Work from restoration to tooth, not the reverse, to avoid ditching enamel.
-
Focus on removing ledges/flash and harmonizing the emergence profile.
-
-
-
Same path, lighter pressure.
-
Aim for a uniform satin surface that already feels smooth to floss.
-
-
Check Contact & Occlusion
Floss should “snap” without shredding. Verify no open contact or food trap. Adjust occlusion if needed. -
Final Polish (Optional)
Add interproximal polishing floss, points, or paste for high-gloss where indicated.
Clinical Tips
- Tension & Angle: Keep the strip slightly curved to mirror tooth anatomy; avoid “sawing” grooves.
- Moisture Control: A dry field increases efficiency and visibility.
- Sequence Discipline: Medium → Fine. Skipping steps leaves scratches that stain later.
- Minimal Pressure: Let the abrasive do the work; excessive force can open contacts or nick enamel.
- Finish Margins Early: Address flash immediately after matrix removal—don’t let resin fully glaze over irregularly.
Common Use Cases
- Class II composite overhangs after band removal
- Class III margins near the line angles of anteriors
- Orthodontic debond cleanup (adhesive remnants interproximal)
- Resin veneer marginal blending without altering facial luster
Troubleshooting
- Strip Won’t Enter: Try a thinner wedge, floss first to open the contact, or start with an ultra-thin fine strip.
- Over-Reduction Risk: Mark the margin with a pencil line; stop as soon as the line disappears.
- Fraying/Breakage: Cut shorter lengths (4–6 cm) and avoid sharp edges; replace worn sections promptly.
Infection Control & Storage
- Single-patient lengths: Cut as needed to prevent cross-contamination.
- Dispense cleanly from the roll; store in a closed drawer away from moisture and heat.
Patient Benefits (Great for Case Acceptance)
- Smoother contacts = easier flossing
- Less plaque retention and staining along margins
- Enhanced comfort—no “catchy” spots or rough edges
Bottom line: A 4 mm x 6 m Fine & Medium Grit Resin Polishing Strips Kit is an inexpensive, high-impact addition to every operatory. Use medium to shape, fine to refine, and finish with a quick gloss step. You’ll deliver tighter contacts, cleaner margins, and longer-lasting esthetics—every time.